Last night for family night activity we had a great time creating photo frames. It was really fun to see all of the kids designs. All we used were wooden frames, sticky felt (felt that already has the adhesive on it) foam stickers and a little bit of glitter. Here are the kids creations.

Showing posts with label Family Night. Show all posts
Showing posts with label Family Night. Show all posts
Tuesday, January 18, 2011


Monday, December 6, 2010
Kidtastic Christmas Ornaments
Need to keep the kids busy? Here is a great recipe for homemade Christmas ornaments.

In a large pot mix,1 cup of cornstarch, 1 cup of salt and 1 cup of water. Stir over low heat until the dough is the consistency of firm mashed potatoes. Let the dough cool, covering it with a damp cloth to prevent drying. It doesn’t take long for it to cool and I actually used mine right away and it was fine.


Roll the dough out to 1/4 of an inch. Press in cookie cutters or you could also make hand prints.


Use a straw to poke a hole in the top of the ornaments so you can put a ribbon through. You can also use a film canister to make a hole in the middle of the ornament for a picture window.


Bake on an ungreased cookie sheet for 3 hours at 200 degrees. Remove from pan and let them air dry for 24 hours. Then decorate your ornaments as desired paint or add glitter then attach a photo on the ornaments you made holes in the middle of, put a ribbon through the top and you’re done!


Tuesday, November 23, 2010
Thankful Turkeys
Another activity for the kids. The kids did this activity at church and I thought it was a great idea and I wanted to do it for our family too.

You will need
- 1 jar
- 1 brown lunch sack
- construction paper
- 1 short wooden spoon
- google eyes
- red felt
- orange ribbon
Directions
First you’ll take your jar and place it inside your brown lunch sack. I weighted my jar with a little bag of rice.


Then I made feet with some orange ribbon and hot glued them to the bottom of the lunch sack.


Then I found a super short wooden spoon that I have been hanging onto forever, I believe it originally came in a pack of 3 from the dollar store. I added google eyes and a construction paper beak and a red felt waddle.


Make some construction paper feathers. When you are done with the feathers everyone takes as many as they need and then they write what they are thankful for on the feathers and then you tape them to the back of the turkey. Now you have a cute, fast, easy, kid friendly display for all of your blessings this year!

Saturday, November 20, 2010
Turkey Bowling
The kids are out of school early this week for parent teacher conferences. So while looking for ways to entertain ourselves we came up with this game.
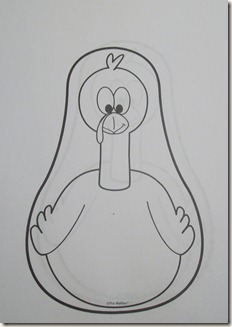


I had this little turkey and doesn’t he look just like a bowling pin? Well we decided to make him into one.

First the kids colored them (very authentic looking turkeys huh?)

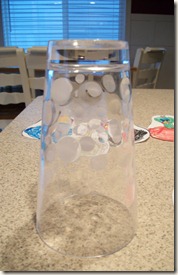
Then I used some clear packaging tape to tape the turkeys to some plastic glasses. You could also attach tail feathers but we decided we couldn’t wait that long.

Then get a ball and find a good spot in your house to go Turkey Bowling!

Wednesday, November 10, 2010
Family Night Fun
So I can’t remember where I learned this game but our family played it on Monday for family night. It was a lot of fun and all you need are a few simple things.
- 1 piece of paper for every group or person
- 1 pencil for every group or person
- 2 dice
Here is how it works
You can either label everyone’s paper like this one or you can just make one master copy that everyone looks at and shares.

The Rules
You take turns rolling the dice until you can build a turkey. The trick is you have to roll all of the numbers in order before you can add on to your turkey. So before you can start drawing you have to roll a 1 to get the body and then your next turn you have to roll a 2 before you can draw the neck and head and so on and so forth until you get to the feathers. (It’s like phase 10) When you reach the 5 feathers you have to roll 1 six for every feather. ALSO anytime in the game if you roll double sixes you tell one thing that you are thankful for.

Have Fun!!
Subscribe to:
Posts (Atom)