

This is how I did it.
You’ll need a spool of elastic thread.

and an empty bobbin.

Loosely wrap the elastic thread around your bobbin until it is full.


Then place it in you machine just like you normally would. Set your stich length to the longest stich and get sewing.
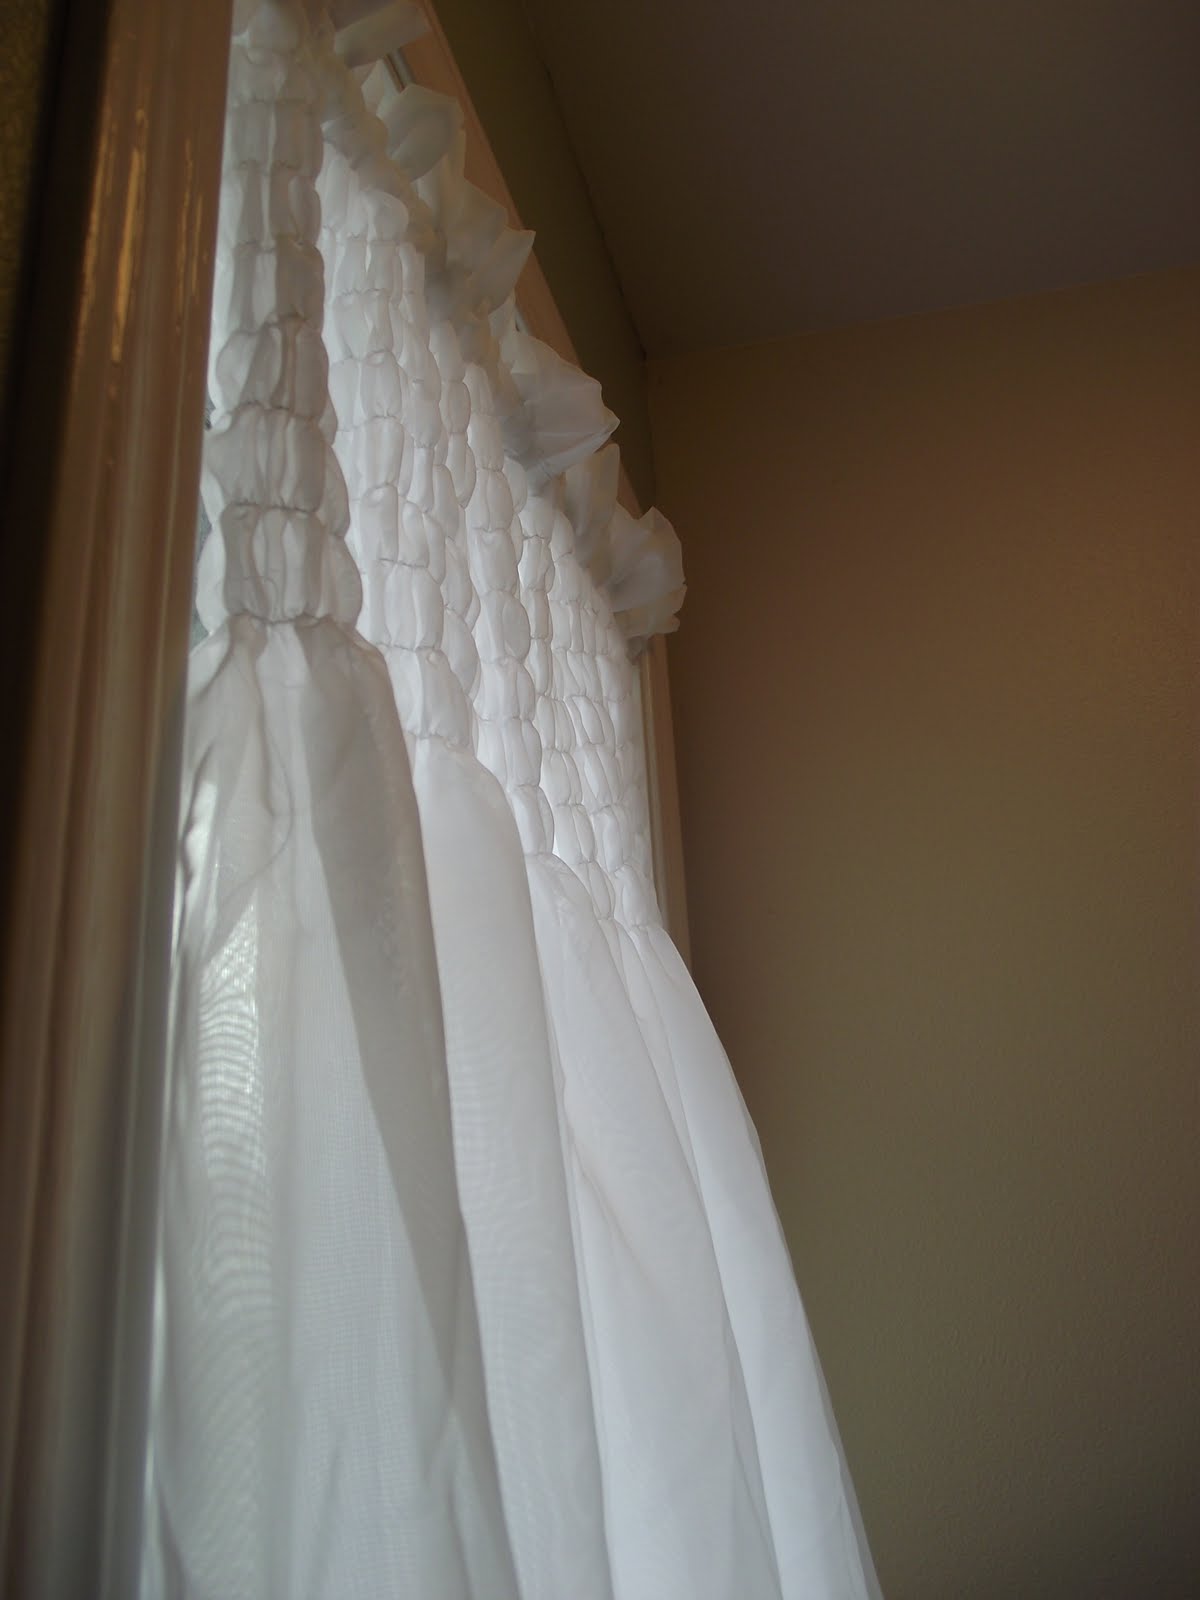
Make sure you have your curtain right side up while you sew. Don’t forget to go back and forth at the beginning and the end.

Keep sewing right side up until you have the desired width.

I used both of my hands to smooth out the un-shirred part and to help guide it through the machine.
%20(2)%5B5%5D.jpg "sewing-001 (276x184) (2)")

My original plan was to shirr the whole curtain (actually my original plan was to to something a little different) but I liked it like this a little better. I still want to try the original plan for something though so stay tuned.


So in the end I used one really long curtain. I cut it in half and used both ends to fill up the window. I could have used half of it and shirred less rows and it would have worked too.
LIKE THIS
I also thought about making a valence.
LIKE THIS (kind of, I didn’t make the valence so I didn’t finish it off) 
But since I had the curtain I used all of it
LIKE THIS
this is so sweet and romantic. would look great in my kitchen, I may have to try it.
ReplyDeletethis is so sweet and romantic. would look great in my kitchen, I may have to try it.
ReplyDeleteThat is very pretty! I love it!
ReplyDeleteThat turned out really well! For some reason sewing with elastic has always scared me, and I would have never thought to put it on the bobbin. I'll have to give it a try...
ReplyDeleteSooo cute. I think I'll try this for my daughter's room. Thanks for sharing!
ReplyDeletevery clever of you, I'm going to have to try that myself!
ReplyDeleteI am in the process of re-doing my girls room, I am going to have to make these now! Did you just use regular thread through the top and the elastic in the bobbin? or elastic on both?
ReplyDeleteYou use the elastic thread in the bobbin only and regular thread in the top. good luck with your curtains!
ReplyDeleteGorgeous! Great tutorial. Happy Friday Hugs! P.S. have you made it over to my new location?
ReplyDeleteWhat a great idea. So beautiful and feminine.
ReplyDeletelove them!! thanks for sharing :)
ReplyDeleteThat is so pretty! I am wanting to make a curtain for my daughter's closet door, and this idea gives me some ideas. :) Thanks for sharing.
ReplyDeleteFollowing from Creative Girls Blog Hop.
Cheers!
Jen
www.cariboobutterfly.com
Great job! I love your curtains. I hadn't thought of using elastic thread.
ReplyDeleteThose are beautiful! I bet they will look magnificent fluttering in the breeze!
ReplyDeleteOh, I need some of those for my guest room! They're gorgeous! Thanks for the tutorial.
ReplyDeleteThese remind me of curtains sold at Pottery Barn. So pretty.
ReplyDeletemegan
craftycpa.blogspot.com
I love it,so Beautiful
ReplyDeleteBeautifully done!
ReplyDeleteI did that by hand gathering some stuff last year, and the sheer thought of doing a curtain was misery.
I did not know you could use elastic like this, now you have made my desire a reality!
Thank you so much for posting this and linking it so i could find it!
Congratulations! You made the round one finals for April on Saturday Mornings! Here is the link! Voting will be near the end of the month and I will give you a button to display proudly!
ReplyDeletehttp://www.thesaturdaymorningsblog.com/2011/04/finalists-for-best-of-april-round-1.html
That's just lovely. Thanks for the instructions!
ReplyDeleteWow, these turned out really pretty! So you just used regular thread for the top? It's amazing how it all just pulled together.
ReplyDeleteHow darling! This would be perfect for my girl's room, they need some new curtains. Thanks for such a great tute.
ReplyDeleteChristina
frozenfamily.com
these are so pretty and whimsical! love them!
ReplyDeleteI'd love for you to link this up to my new link party, Your Whims Wednesday! http://mygirlishwhims.blogspot.com/2011/04/your-whims-wednesday-1.html
I totally love this! And actually I have been wondering how you use that elastic thread, so thanks for showing how!
ReplyDeleteI wonder if you would be interested in writing a special guest post on Remodelaholic about the project! Let me know, I will send you the details.
Thanks,
Cassity
Great tutorial! Such sweet curtains, love it. Thanks for linking to Fabric Tuesday :)
ReplyDeleteoooh I love these! very cute.
ReplyDeleteHi there I am a new follower and love your blog
ReplyDeleteThose curtains are so cute.
Stop by any time.
http://thisnthatboutiqueblog.blogspot.com/
http://www.etsy.com/shop/ThisanThatBoutique
That is genius...looks high dollar! Great job!
ReplyDeleteI love this! I'll be linking on Thursday--I hope you will stop my! ;)
ReplyDeleteBeautiful.
ReplyDeleteTess
You did an amazing job on these! I would never have thought to use elastic thread, it worked out perfect!
ReplyDeleteWho knew this could be so simple. I have to find me some of that elastic thread! Beautiful.
ReplyDelete